Dataset Node
The Dataset node is a useful component in the Siml.ai visual editor, allowing users to create data-driven or hybrid physics+data driven neural simulators. This guide will walk you through the process of using the Dataset node effectively, from creating a dataset to configuring it within your simulator.
Understanding the Dataset Node
The Dataset node serves as a way to connect data from sensors, past simulations, physical models (extracted by, for example, particle velocimetry), or other sources. It allows you use imported dataset in CSV format (note: we'll support more in future!) by connecting the values from it to the variables of your simulator. In the visual editor, the Dataset node appears as a gold-colored block with the label "Dataset" at the top. It can be connected to other neural network in your simulation workflow, enabling data-driven traning.
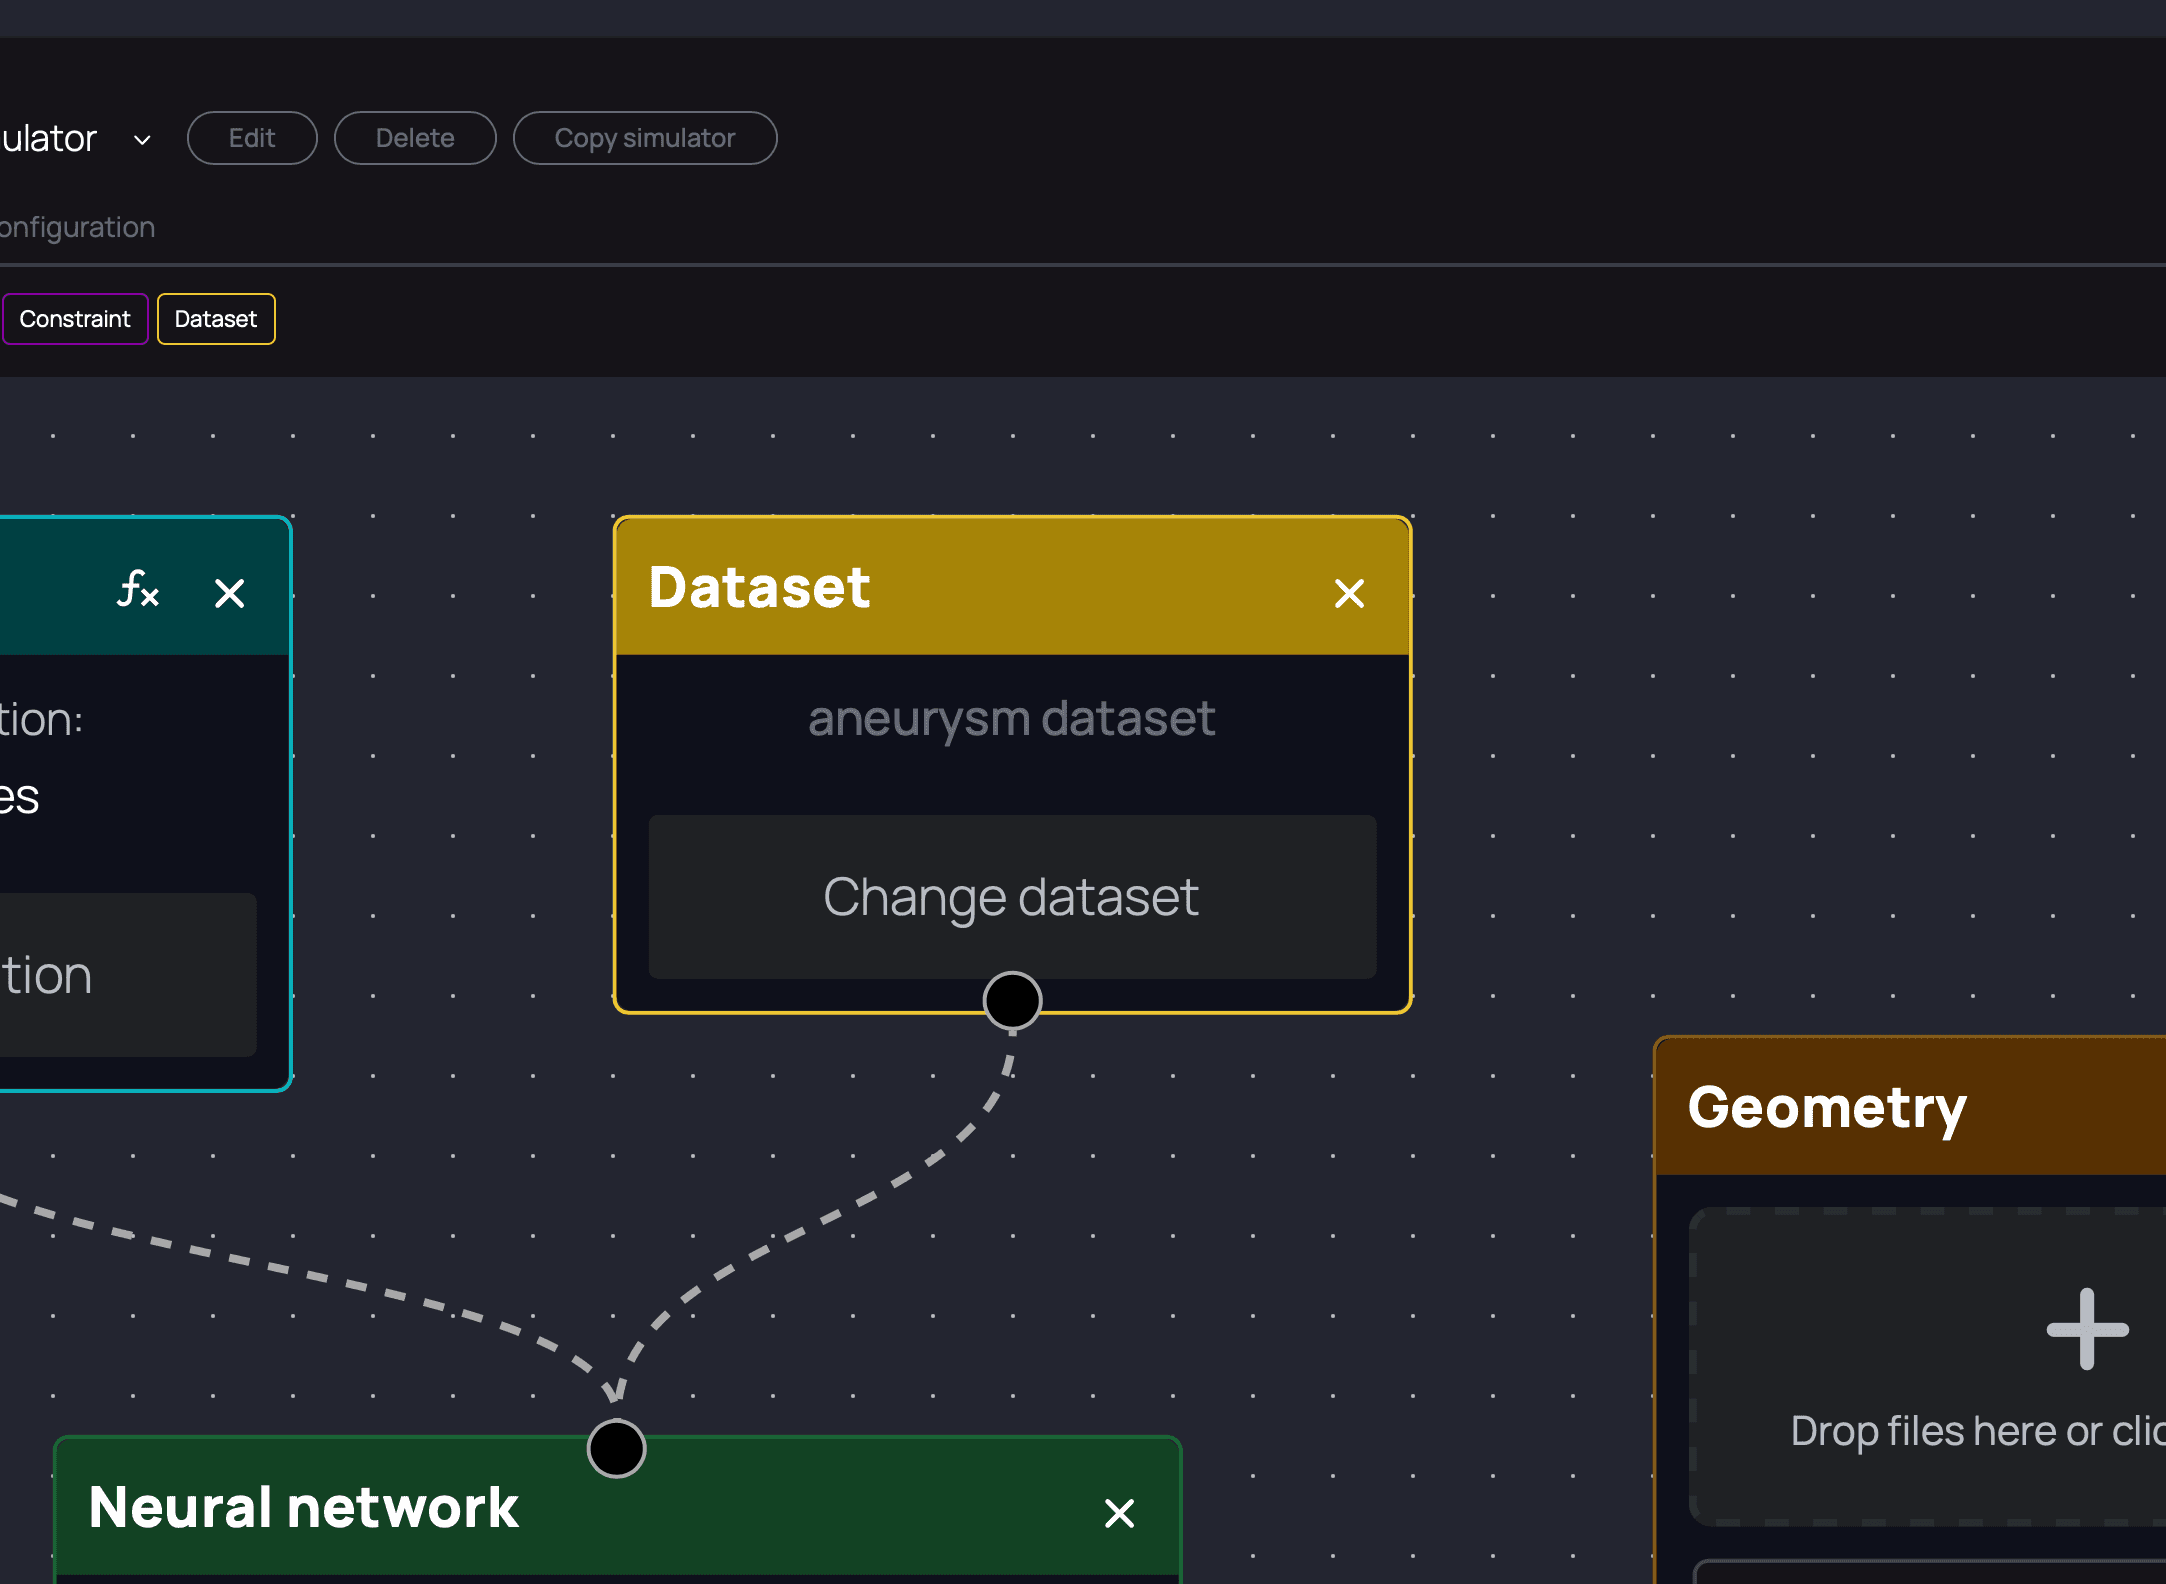
Figure 1.: Dataset node in visual editor
Creating a Dataset
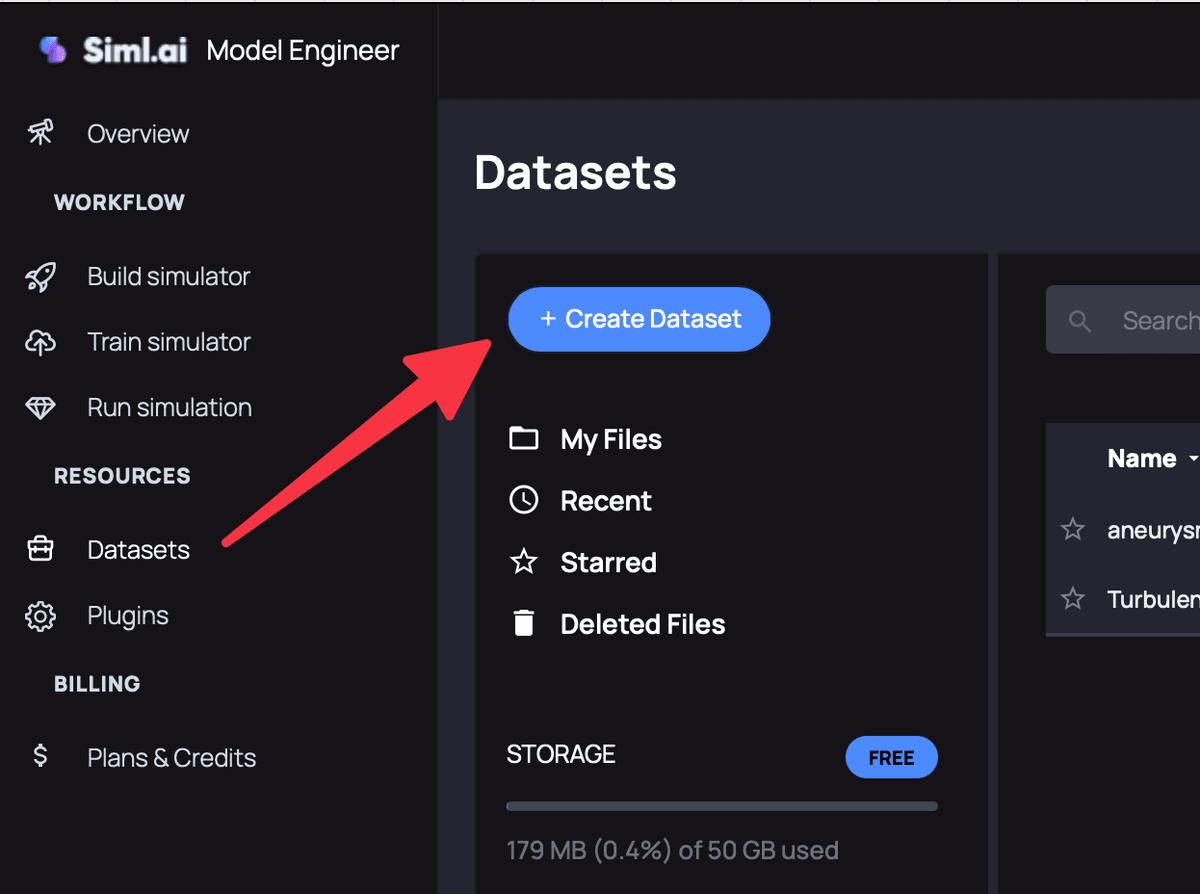
Figure 2.: Adding a dataset
Before you can use a Dataset node in your simulation, you need to have a dataset available in the Siml.ai database. Here's how to create one:
- Navigate to the Datasets page in the Siml.ai interface.
- Click the "+ Create Dataset" button.
- In the "Create Dataset" dialog:
- Enter a name for your dataset in the "Dataset name" field.
- Optionally, add a description to provide context about the dataset.
- Choose whether to make the dataset public or keep it private.
- Add your CSV file by either dragging and dropping it into the designated area or clicking to select the file from your computer.
- Click "Create Dataset" to add it to your database - this will trigger the uploading of the file to our cloud.
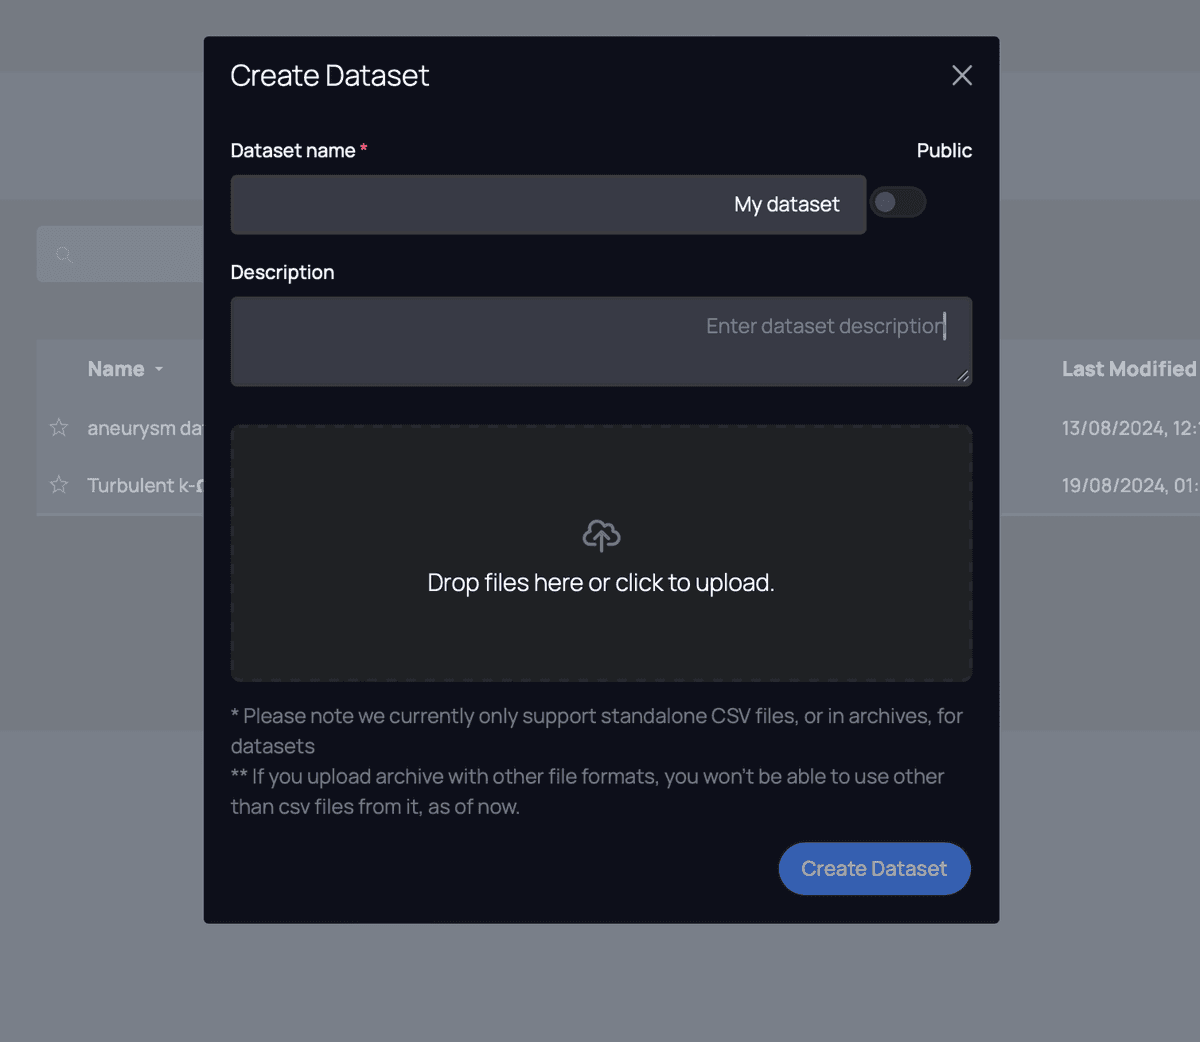
Figure 3.: Dataset creation popup
Note: Currently, Siml.ai only supports standalone CSV files or CSV files within archives for datasets.
Once you've filled in the necessary information and uploaded your file, you will see your dataset in the list of datasets on the page:
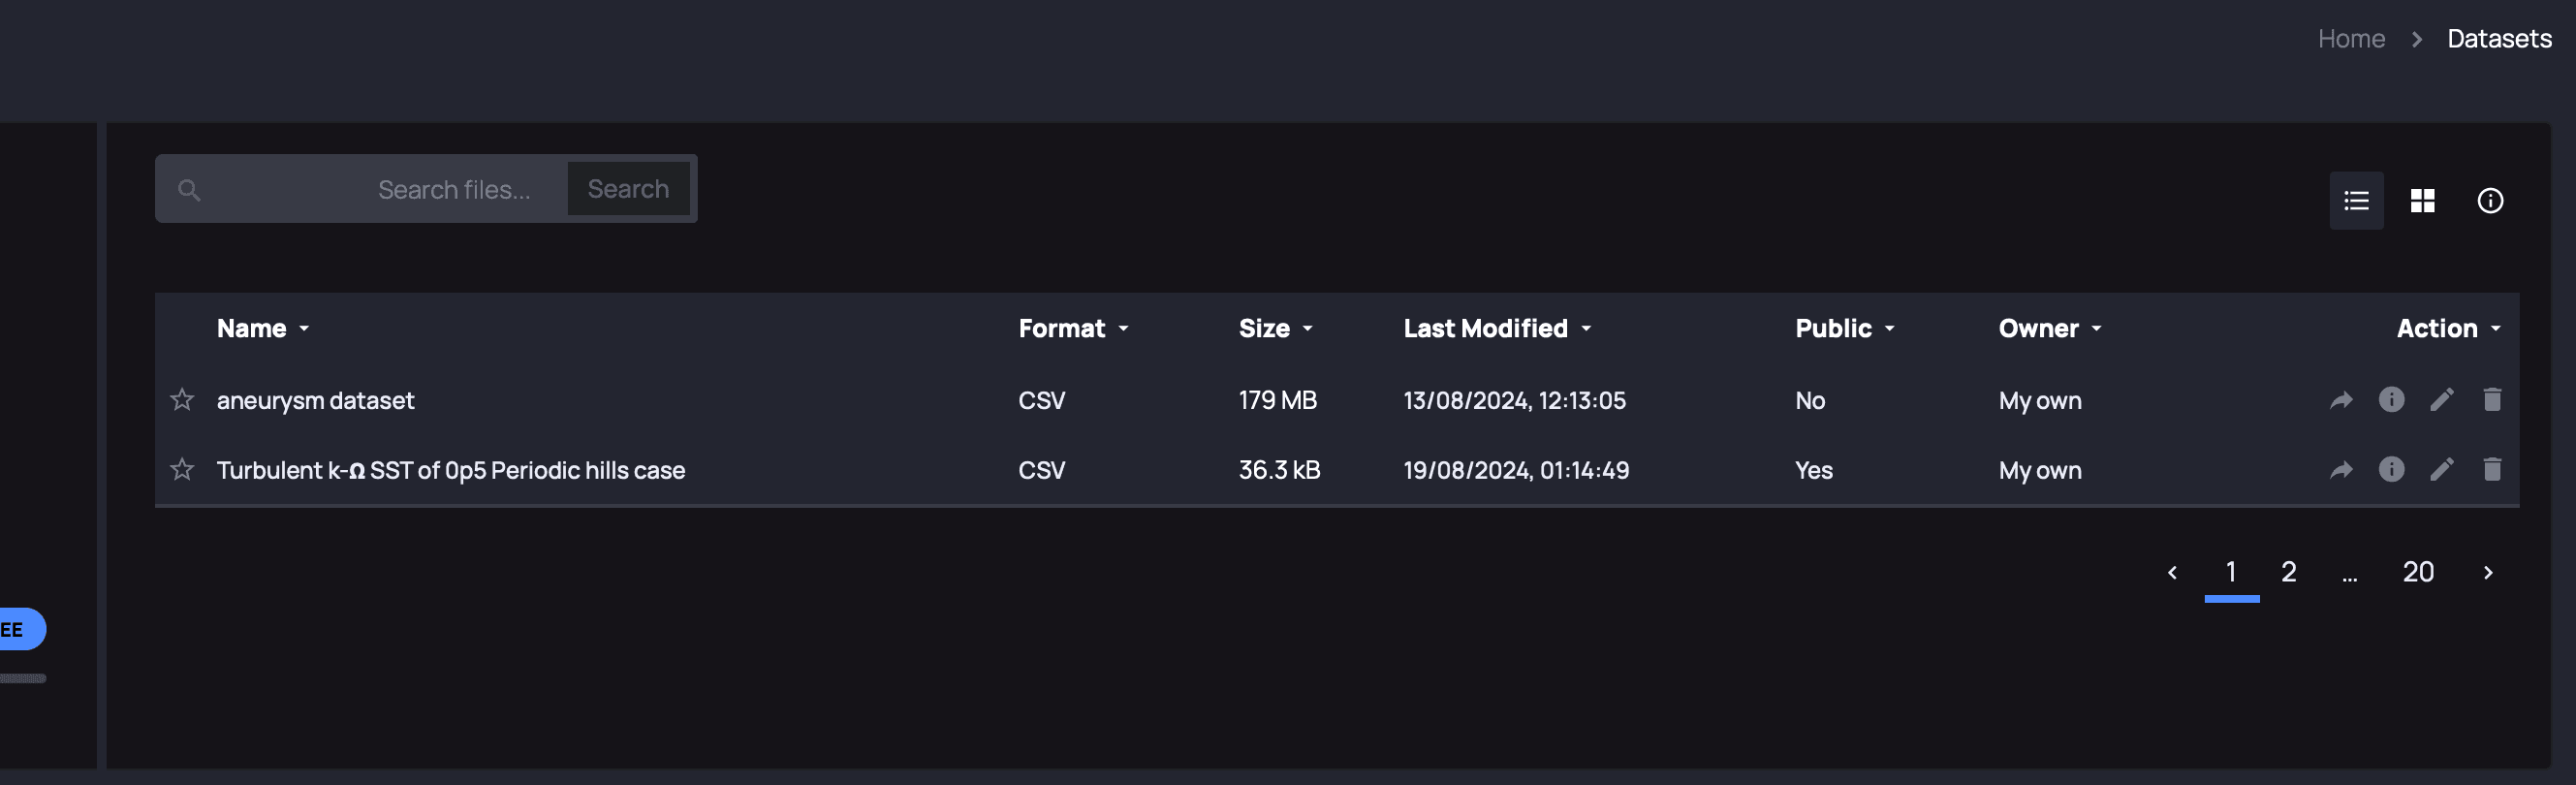
Figure 4.: Datasets list on the datasets page
Checking Data in the Dataset Detail Page
After creating a dataset, you can view and verify its contents:
- From the Datasets page, click on the name of your dataset to open its detail page.
- In the detail page, you'll see a table displaying the first few rows of your dataset.
- The column headers of your CSV file will be shown at the top of the table.
- You can scroll through the data to get an overview of its structure and contents.
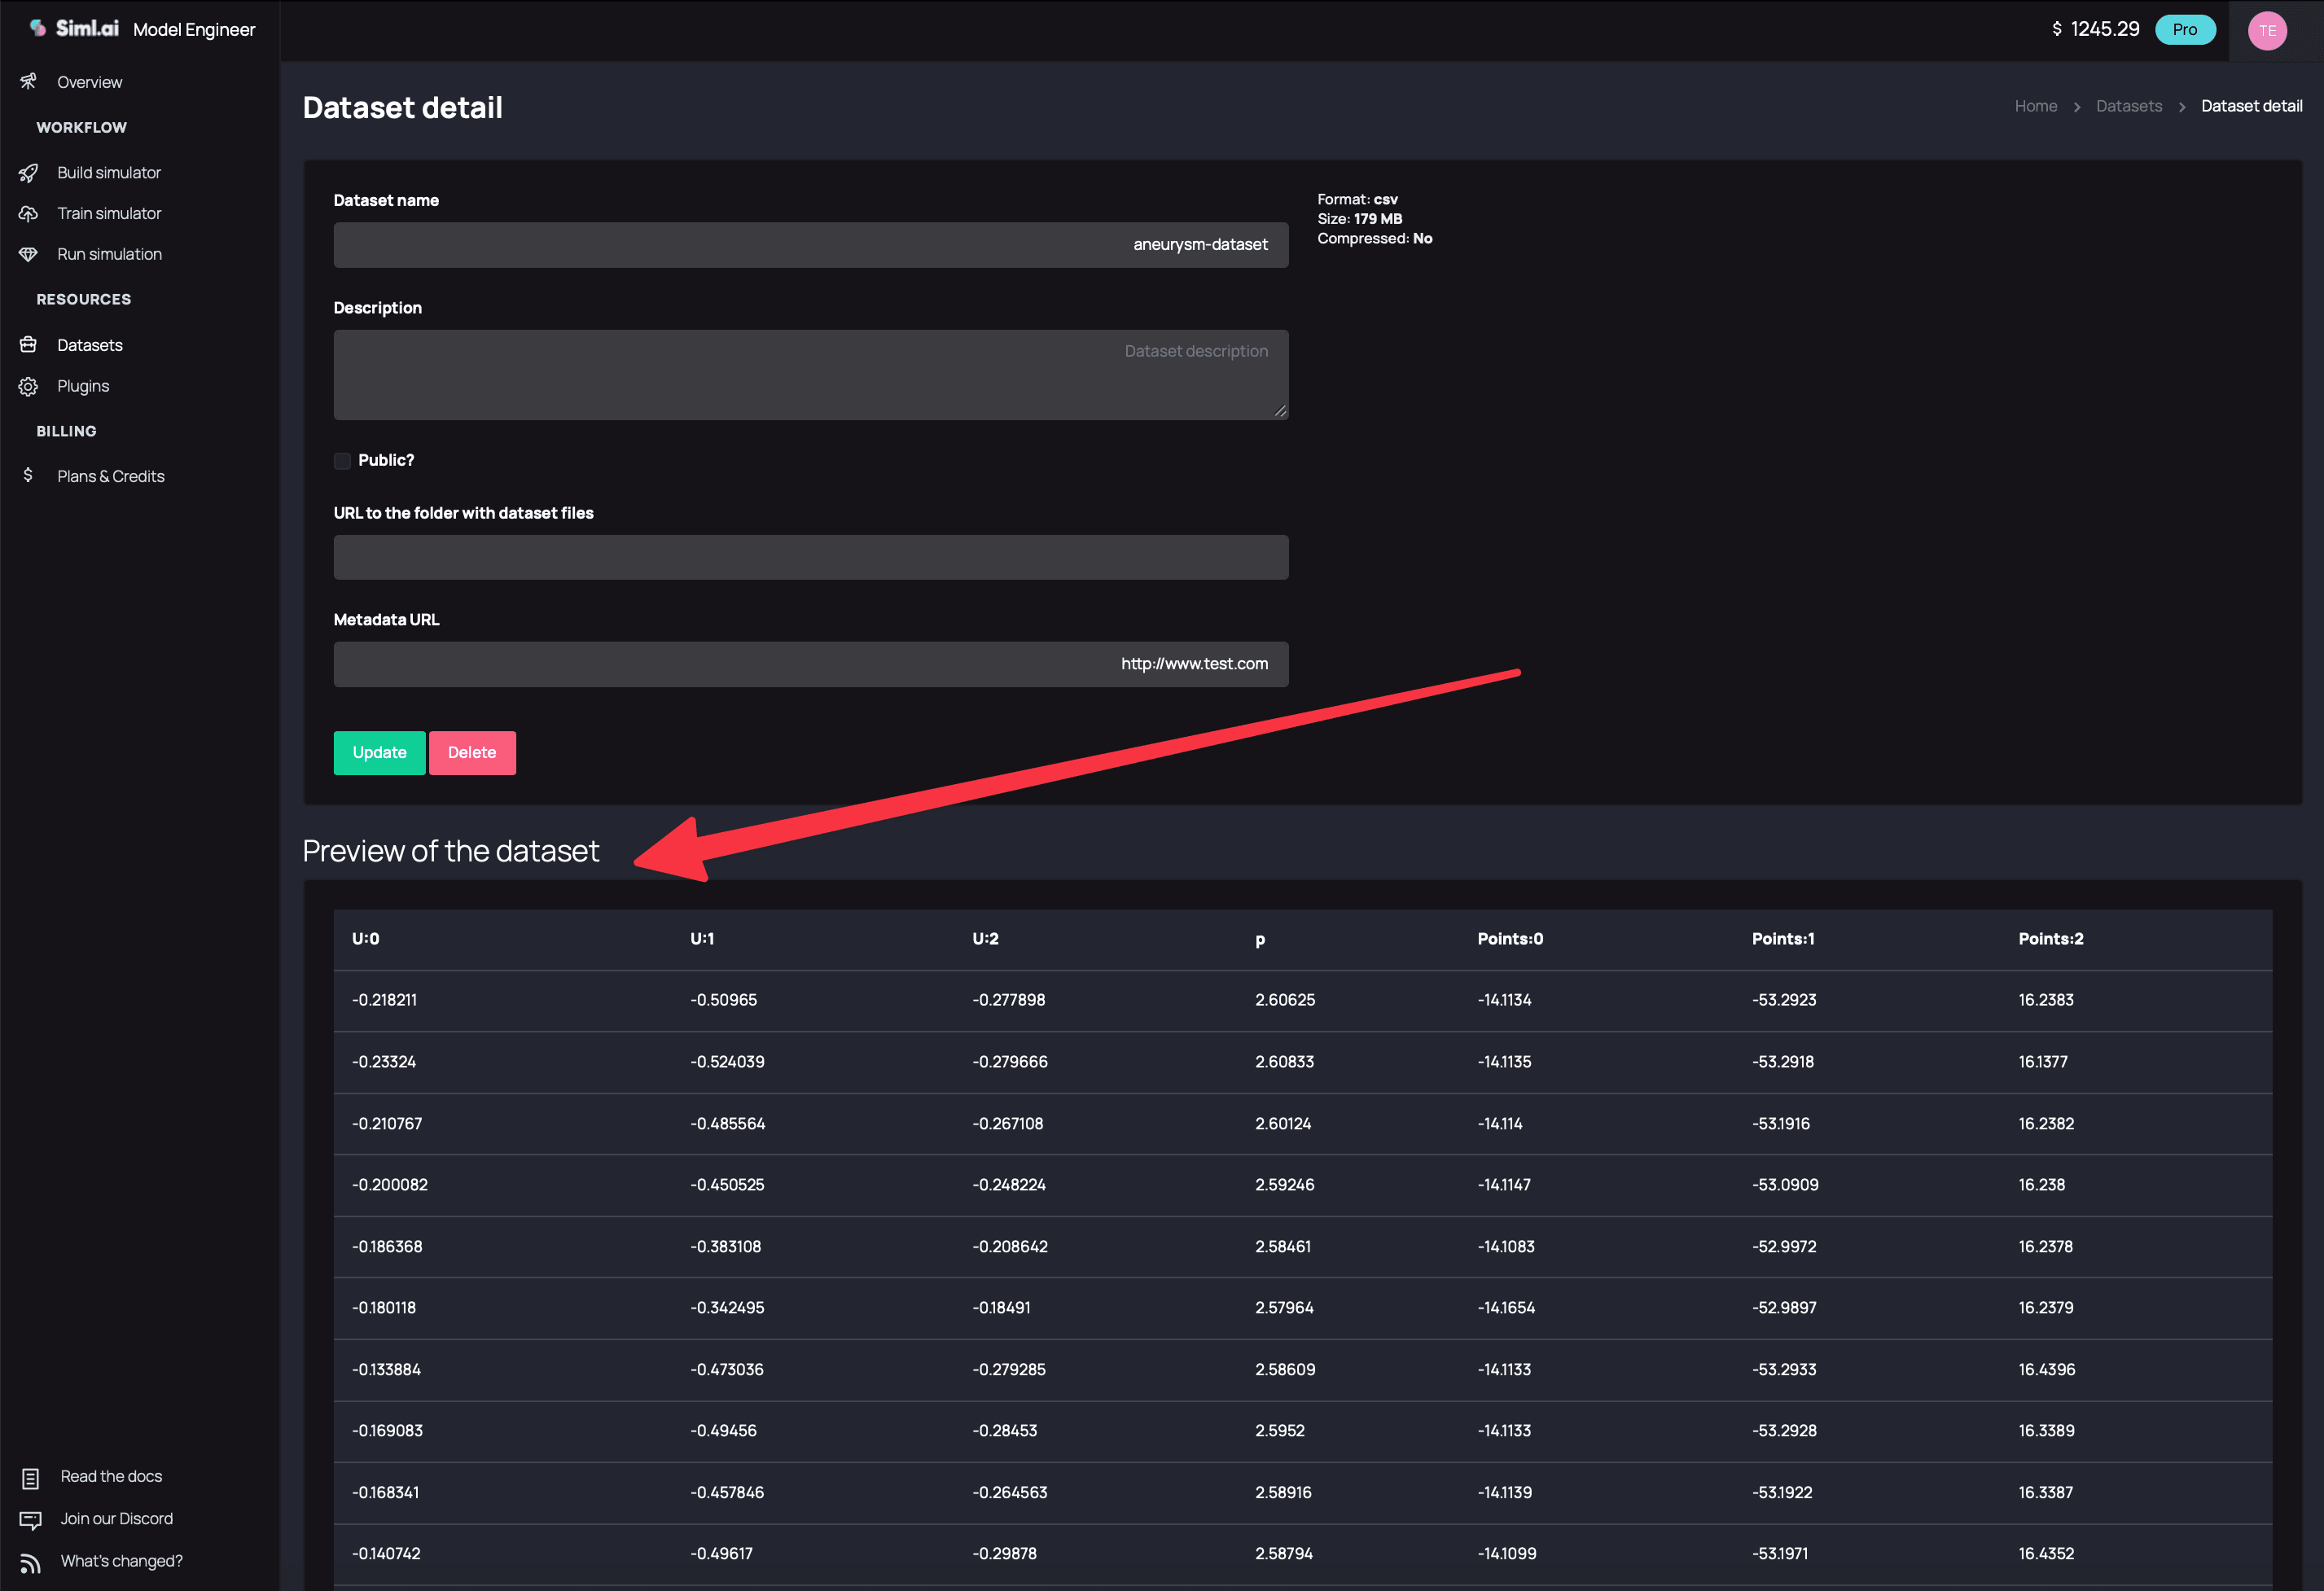
Figure 5.: Dataset detail preview
This view is particularly useful for ensuring that your data has been imported correctly and for familiarizing yourself with the structure of the dataset before using it in your simulation.
Working with the Dataset Node in the Visual Editor
Once you have a dataset in your database, you can use it within your simulation:
- In the visual editor, drag a Dataset node onto your workspace.
- Click on the Dataset node to open its configuration panel.
- Use the dropdown menu to select the dataset you want to use (e.g., "aneurysm dataset" as shown in the image).
- If you need to change the dataset, use the "Change dataset" button.
Connecting Column Headers to Variable Names
One of the most important aspects of configuring the Dataset node is mapping the column headers from your CSV file to variable names that will be used in your simulation. This process allows you to reference specific data columns in other parts of your simulation.
To map column headers to variable names:
- In the Dataset node configuration panel, you'll see a list of fields corresponding to your CSV columns.
- Each field will have the column header name on the left (e.g., "U:0", "U:1", "U:2") and an input box on the right.
- In the input boxes, enter the variable names you want to use for each column in your simulation. For example:
- Map "Points:0" to "x"
- Map "Points:1" to "y"
- Map "Points:2" to "z"
- Map "U:0" to "u"
- Map "U:1" to "v"
- Map "U:2" to "w"
- Map "p" to "p"
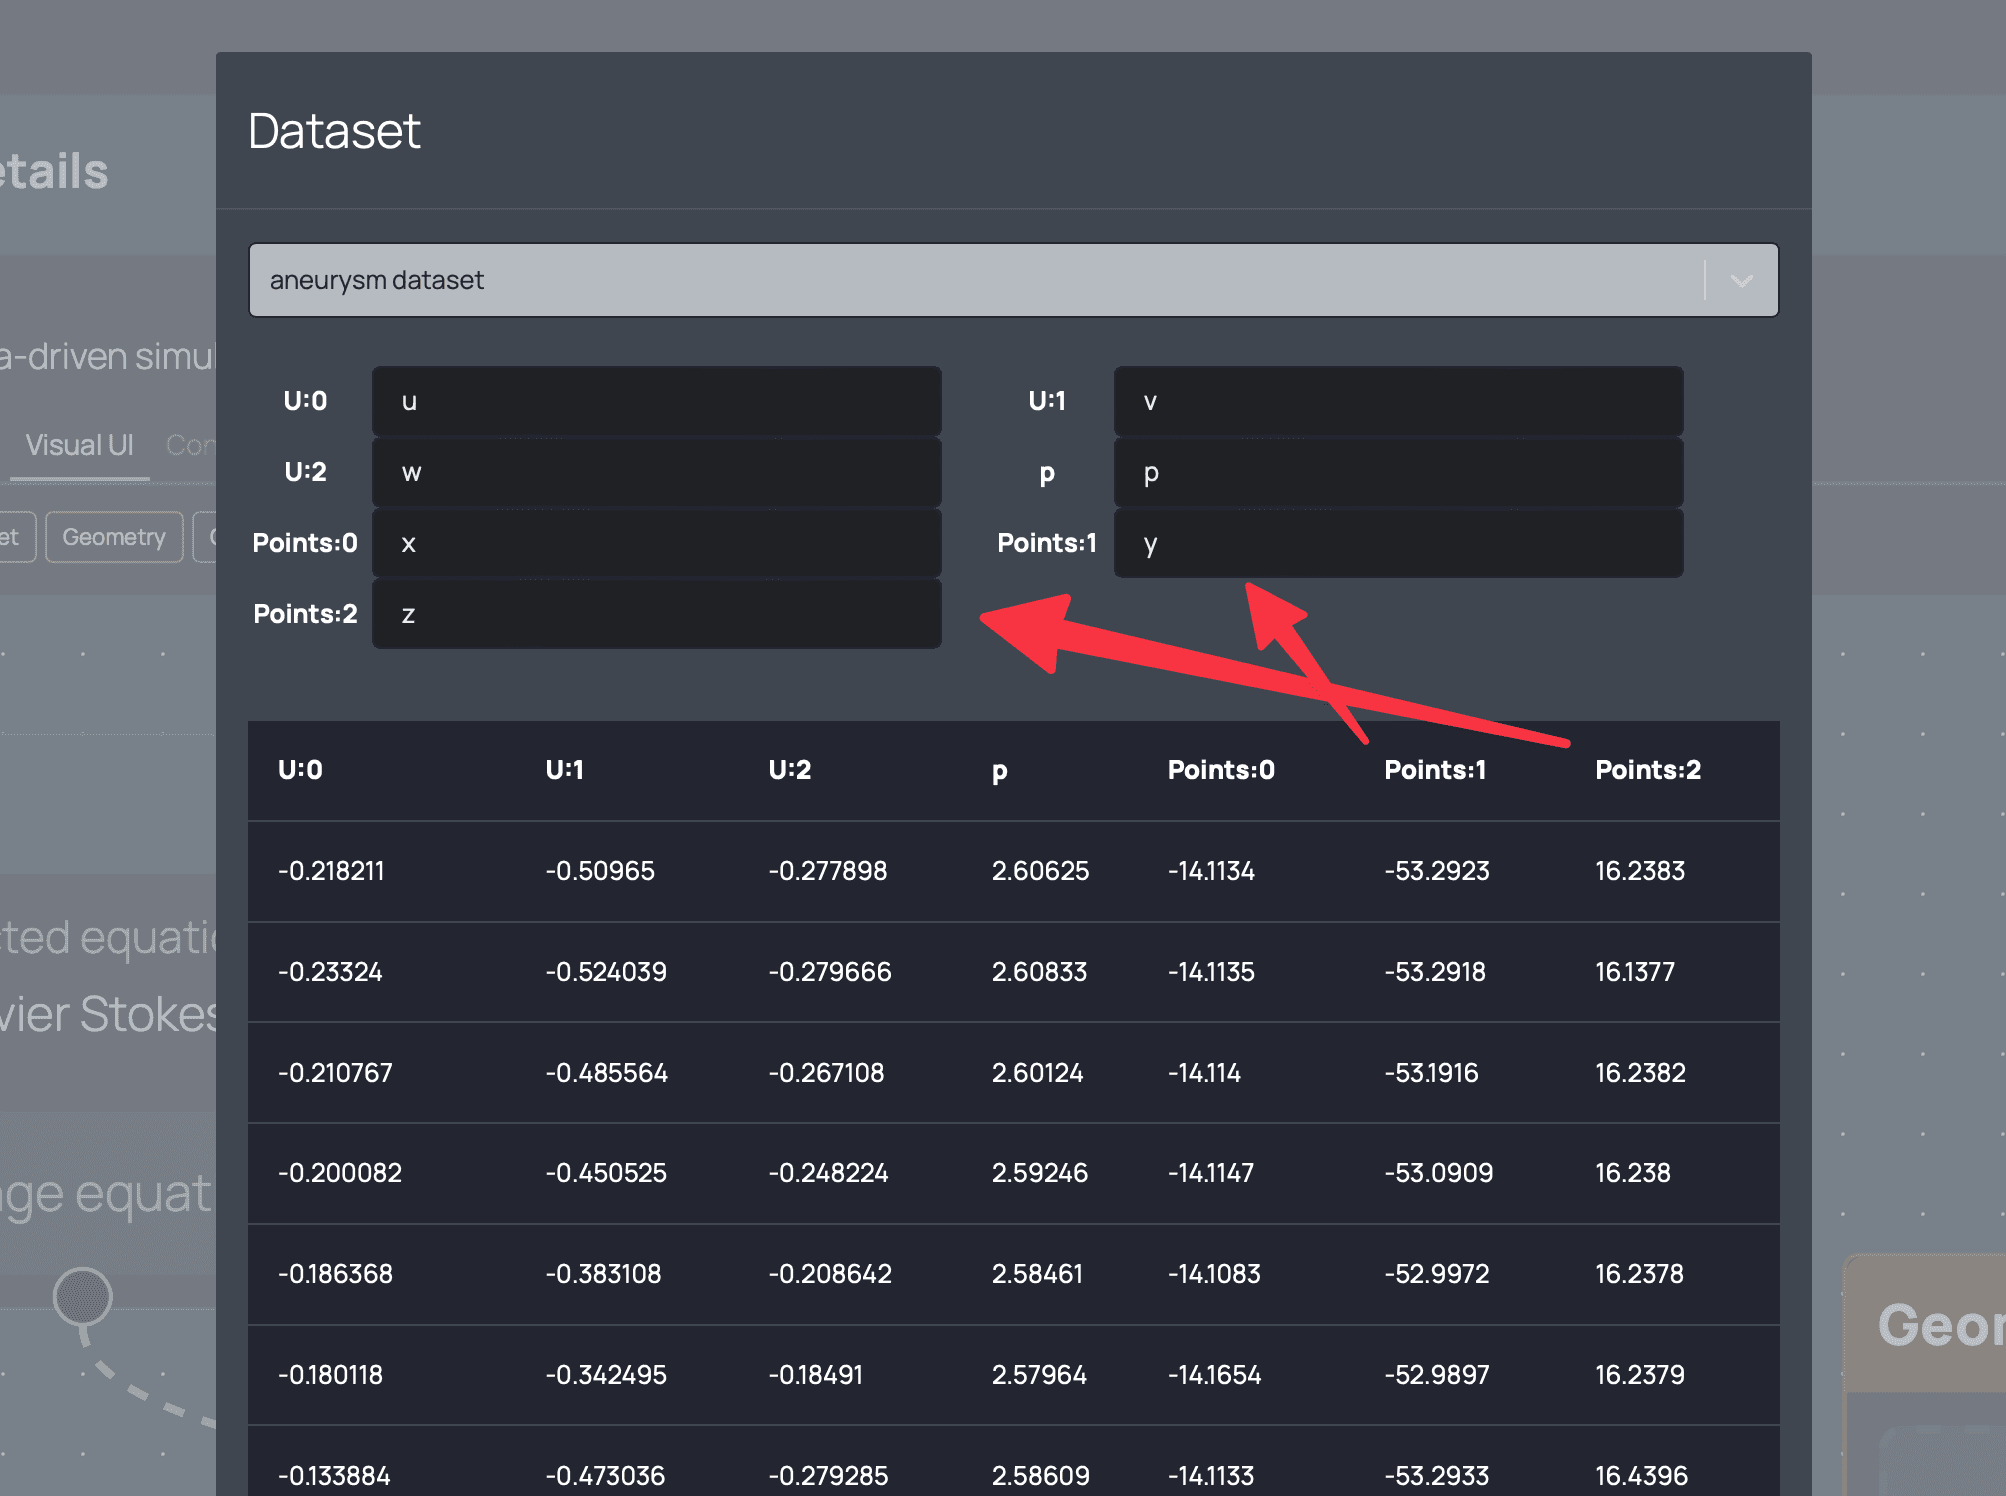
Figure 6.: Dataset node settings
By mapping these columns to meaningful variable names, you allow the neural network to reference them during the training of the simulator.
When building hybrid physics+data driven simulators, you could use use "u", "v", and "w" as velocity components in constraints of a fluid dynamics simulation.